배운 내용들을 바탕으로 혼자서 NPC 프리팹을 완성 해 보았습니다.
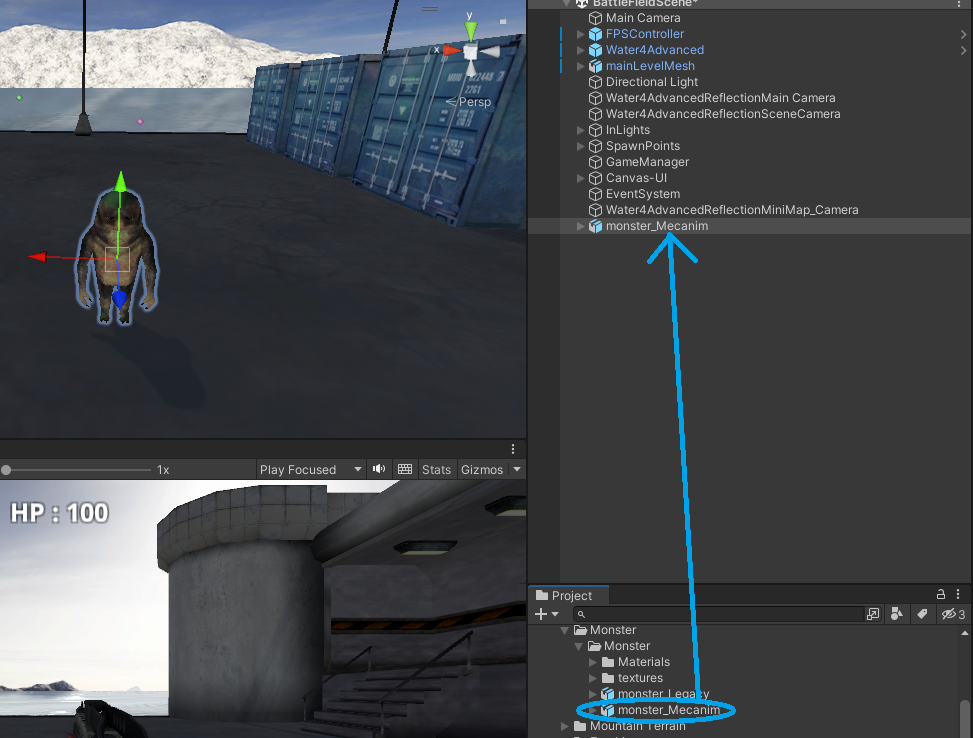
몬스터 프리팹 생성, 일단 Hierachy에 놓고 우측 Animator 보겠습니다.
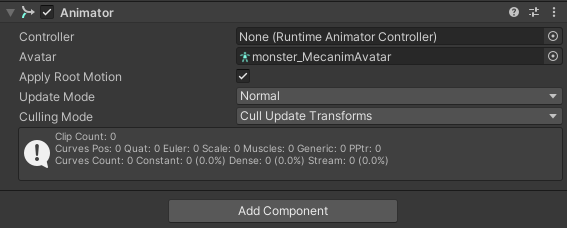
Controller 항목이 비어있습니다.
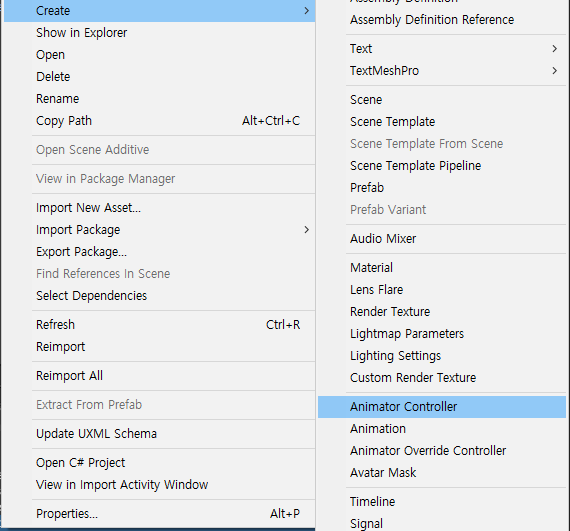
Animator Controller 생성
이름을 Monster Animator Controller 라고 하겠습니다.
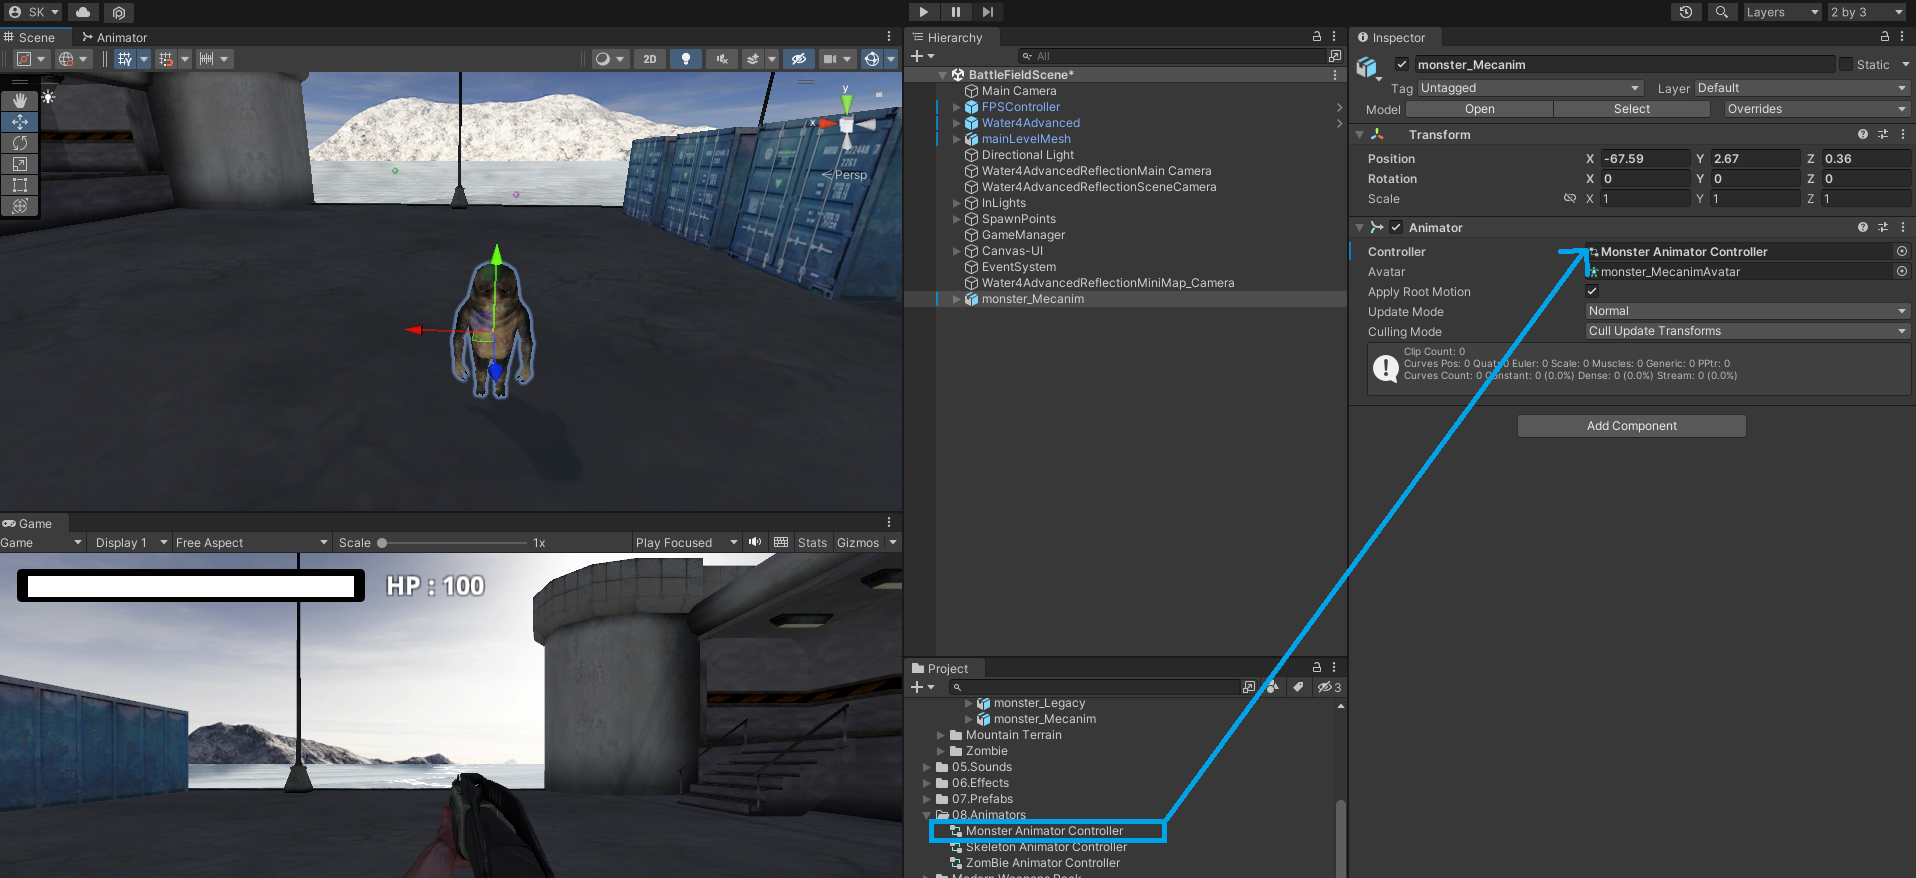
연결 해주고 Animator Window열었습니다.
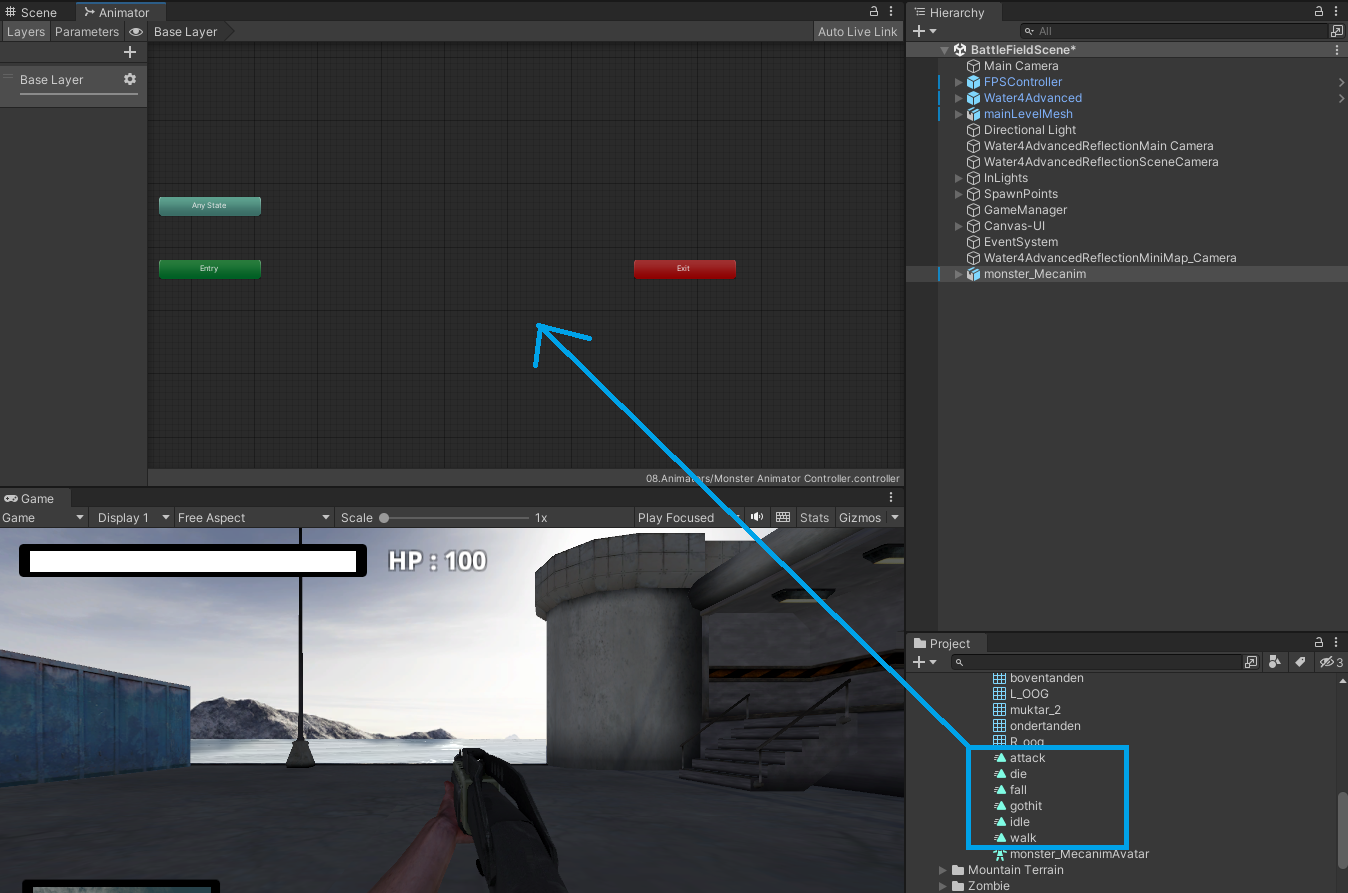
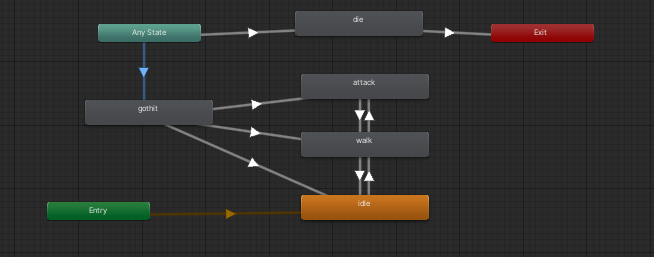
애니메이션 파일을 찾아서 넣고, 플로우를 구성 했습니다.
Animation Parameter를 생성했습니다.
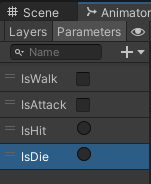
Transition 플로우에 알맞게 Parameter를 추가했습니다.
Loop Time 등 애니메이션이 올바르게 작동하도록 설정 해주었습니다.
유닛 크기에 맞게 Capsule Collider와 Rigidbody를 생성해주고 움직이는 로직을 구현해줄 NavMeshAgent 컴포넌트를 추가 해 주었습니다.
추가로 머리 위에 HP바도 구현 했습니다.
스크립트를 만들어 보았습니다.
<컨트롤 클래스>
using System.Collections;
using System.Collections.Generic;
using UnityEngine;
using UnityEngine.AI;

public class MonsterCtrl : MonoBehaviour
{
    public Animator animator;
    public NavMeshAgent agent;
    public Transform monsterTr;
    public Transform playerTr;
    [Header("플레이어와 몬스터간의 거리")]
    [SerializeField]
    private float dist;
    private float attackDist = 2.5f;
    private float traceDist = 20f;
    private MonsterDamage monDamage;


    void Start()
    {
        monsterTr = GetComponent<Transform>();
        playerTr = GameObject.FindWithTag("Player").transform;
        animator = GetComponent<Animator>();
        agent = GetComponent<NavMeshAgent>();
        monDamage = GetComponent<MonsterDamage>();
    }

    // Update is called once per frame
    void Update()
    {
        if (monDamage.isHit == true || monDamage.isDie == true)
            return;
        dist = Vector3.Distance(playerTr.position, monsterTr.position);
        if (dist <= attackDist)
        {
            agent.isStopped = true;
            animator.SetBool("IsAttack", true);
        }
        else if (dist <= traceDist)
        {
            agent.isStopped = false;
            agent.destination = playerTr.position;
            animator.SetBool("IsAttack", false);
            animator.SetBool("IsWalk", true);
        }
        else
        {
            agent.isStopped = true;
            animator.SetBool("IsWalk", false);
        }
    }

    public void MonsterStop()
    {
        agent.isStopped = true;
        agent.velocity = Vector3.zero;
    }
}
<대미지 클래스>
using System.Collections;
using System.Collections.Generic;
using UnityEngine;
using UnityEngine.UI;
using UnityEditor;
using System;

public class MonsterDamage : MonoBehaviour
{
    public Animator animator;
    public bool isDie;
    public bool isHit;
    public MonsterCtrl monCon;
    public GameObject BloodEffect;
    public Rigidbody rb;
    public CapsuleCollider monCol;
    public Image hpBar;


    [Header("HP 관리")]
    [SerializeField]
    private float hp;
    [SerializeField]
    private float maxHp = 100;
    [SerializeField]
    private int damage = 25;
    [SerializeField]
    private float flinching = 1.0f; //총알에 맞았을 때, 움찔하는 시간


    // Start is called before the first frame update
    void Start()
    {
        monCol = GetComponent<CapsuleCollider>();
        monCon = GetComponent<MonsterCtrl>();
        animator = GetComponent<Animator>();
        isDie = false;
        isHit = false;
        hp = maxHp;
        rb = GetComponent<Rigidbody>();
        hpBar.color = Color.green;
    }

    private void OnCollisionEnter(Collision col)
    {
        if (col.gameObject.tag == "BULLET")
        {
            Debug.Log("몬스터 총알 힛트");
            Destroy(col.gameObject);
            MonsterOnHit();
            monCon.MonsterStop();
            hp -= damage;
            hp = Mathf.Clamp(hp, 0, 100);
            GameObject blood = Instantiate(BloodEffect,
                col.gameObject.transform.position, Quaternion.identity);
            Destroy(blood, 1.5f);

            monHpBarColor();

            if (hp <= 0)
                MonsterDie();
        }


    }

    private void monHpBarColor()
    {
        hpBar.fillAmount = hp / maxHp;
        if (hpBar.fillAmount < 0.3)
            hpBar.color = Color.red;
        else if (hpBar.fillAmount <= 0.5)
            hpBar.color = Color.yellow;
    }


    public void MonsterOnHit()
    {
        // 피격 애니메이션 재생
        animator.SetTrigger("IsHit");

        // 움직임 멈춤 및 1초 후 움직임 재개
        StartCoroutine(StopMovementForSeconds(flinching));
    }

    private IEnumerator StopMovementForSeconds(float seconds)   //StartCoroutine의 StopMovementForSeconds을 사용하여 (매개변수)초 동안 bool변수 isHit을 붙잡아 두는 메소드
    {
        isHit = true;
        yield return new WaitForSeconds(seconds);
        isHit = false;
    }

    public void MonsterDie()    //죽으면 진행되는 메소드, 애니메이션 출력과 함께 이동 멈춘다. 5초뒤 소멸
    {
        isDie = true;
        animator.SetTrigger("IsDie");
        monCon.MonsterStop();
        rb.isKinematic = true;
        monCol.enabled = false;
        Destroy(this.gameObject, 5.0f);
    }
}
기존의 컨트롤러/대미지 클레스에는 총알에 맞았을 때, 움찔거리는 애니메이션이 출력되긴 하지만
위치 이동을 담당하는 과정이 Update함수로 호출 되기 때문에 1프레임만 멈췄다가 다시 이동하게 되는 현상이 발생합니다.
즉, 1프레임 멈췄다가 움찔거리는 모션만 보여주면서 실제 좌표는 이동되고 있는 현상인거죠
이 현상을 해결하기 위해 StartCoroutine을 사용했습니다.
StopMovementForSeconds 라는 함수를 처음 사용해 보았는데요.
매개변수로 float 값을 받아서 동작하고, 그것을 활용해서 해당 시간동안 대기 시키는 역할을 합니다.
인터프리트 언어인 AutoHotKey를 잠깐 했었는데 그때 사용했던 sleep 기능과 비슷한 역할을 하는것 같네요.
flinching 이라는 float 변수와 isHit이라는 bool변수를 만들어서 해당 시간동안 멈추도록 만들었고
<Ctrl 클래스>에서
if (monDamage.isHit == true || monDamage.isDie == true)
return;
이 문장으로 Update 함수를 빠져나오도록 지시했습니다.
이로서 isHit 또는 isDie가 true 일 때에는 움직이지 않게 되었습니다.
'게임프로그래밍 개발 수업 > 유니티 수업' 카테고리의 다른 글
| 유니티(11) F키로 Flash OnOff, 미니맵 만들기, 123으로 총기 교체 만들기 (0) | 2023.03.29 |
|---|---|
| 유니티 (10) FPS 게임, 플레이어의 피격 효과 구현 하기, 애니메이션 이벤트 삽입 (0) | 2023.03.28 |
| 유니티 09 HP BAR UI 만들기, 출혈, 게임매니저의 등장 (0) | 2023.03.27 |
| 유니티 08 - NPC(적)의 구현 복습하기 (0) | 2023.03.24 |
| 유니티 06 - 탄피 배출 파티클 이펙트 적용 하기, 스크립트로 애니메이션출력 해보기, Navigation 을 통해 NPC를 이동시켜 보기 (0) | 2023.03.23 |


